VALD
With the Performance PRO Plan, there is a direct integration with VALD, so you can sync your athletes' test data to RYPT from your VALD Hub in just a few clicks. The integraton currently includes ForceDecks and NordBord. SmartSpeed, ForceFrame, and DynaMo will be added soon.

Once your testing data is added, you can view your athletes' full exercise and test history, track and visualise performance, monitor physical readiness, and give your athletes instant access to their own performance data via the RYPT app.
This guide takes you through how to set up the integration and import your data.
Step 1 / Request access to the integration
First, you'll need to request access to the integration. To request access, please email support@vald.com, and copy hello@rypt.app, to let them know that you'd like to integrate your data with RYPT.
Once VALD have granted access to the integration for you account, the RYPT team will map your VALD account to your RYPT account and you'll be ready to start using the integration in RYPT.
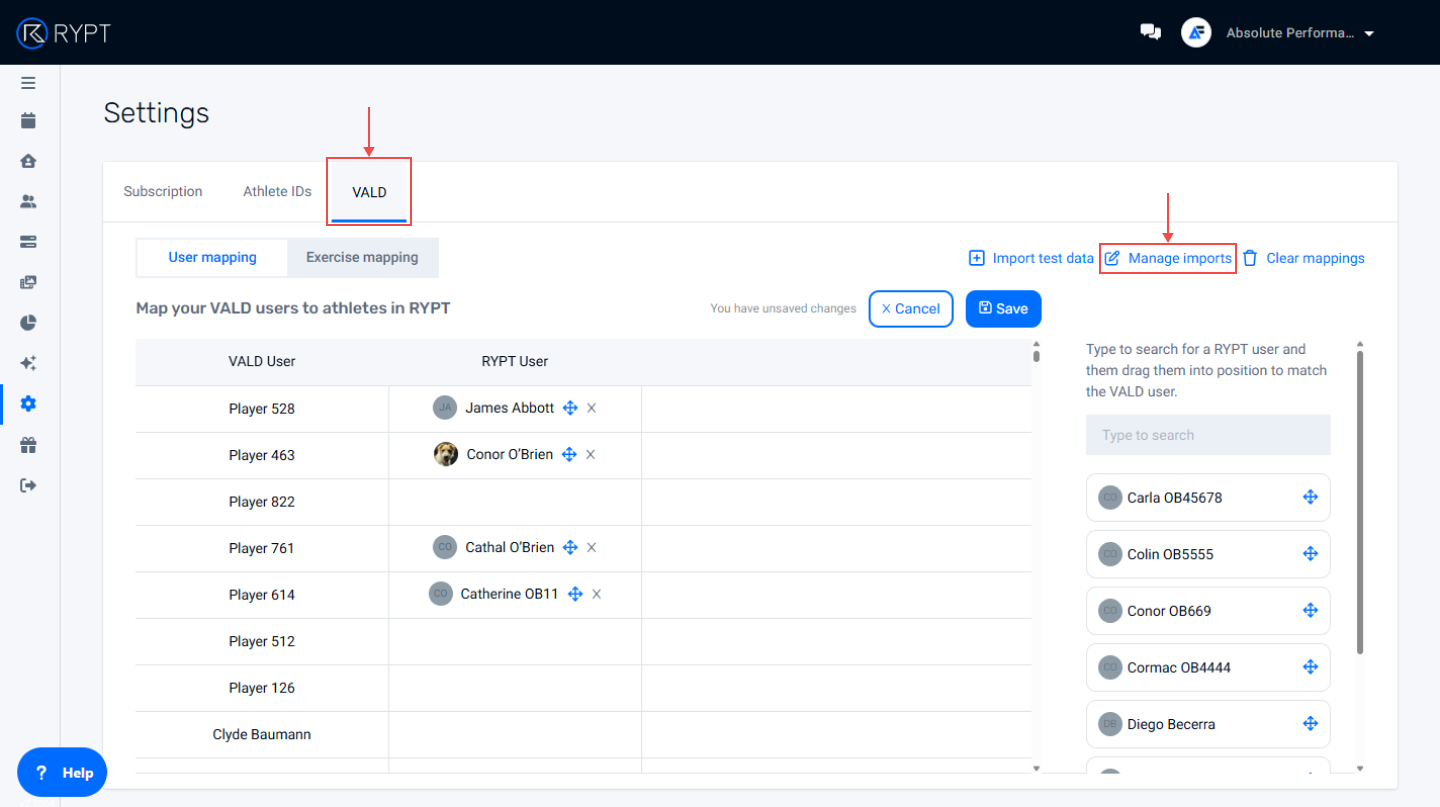
Step 2 / Map your athletes in RYPT
Next, is to map your athletes in RYPT to the correspoding athlete account in your VALD Hub. This can be done via Settings screen in your RYPT account, on the VALD tab.
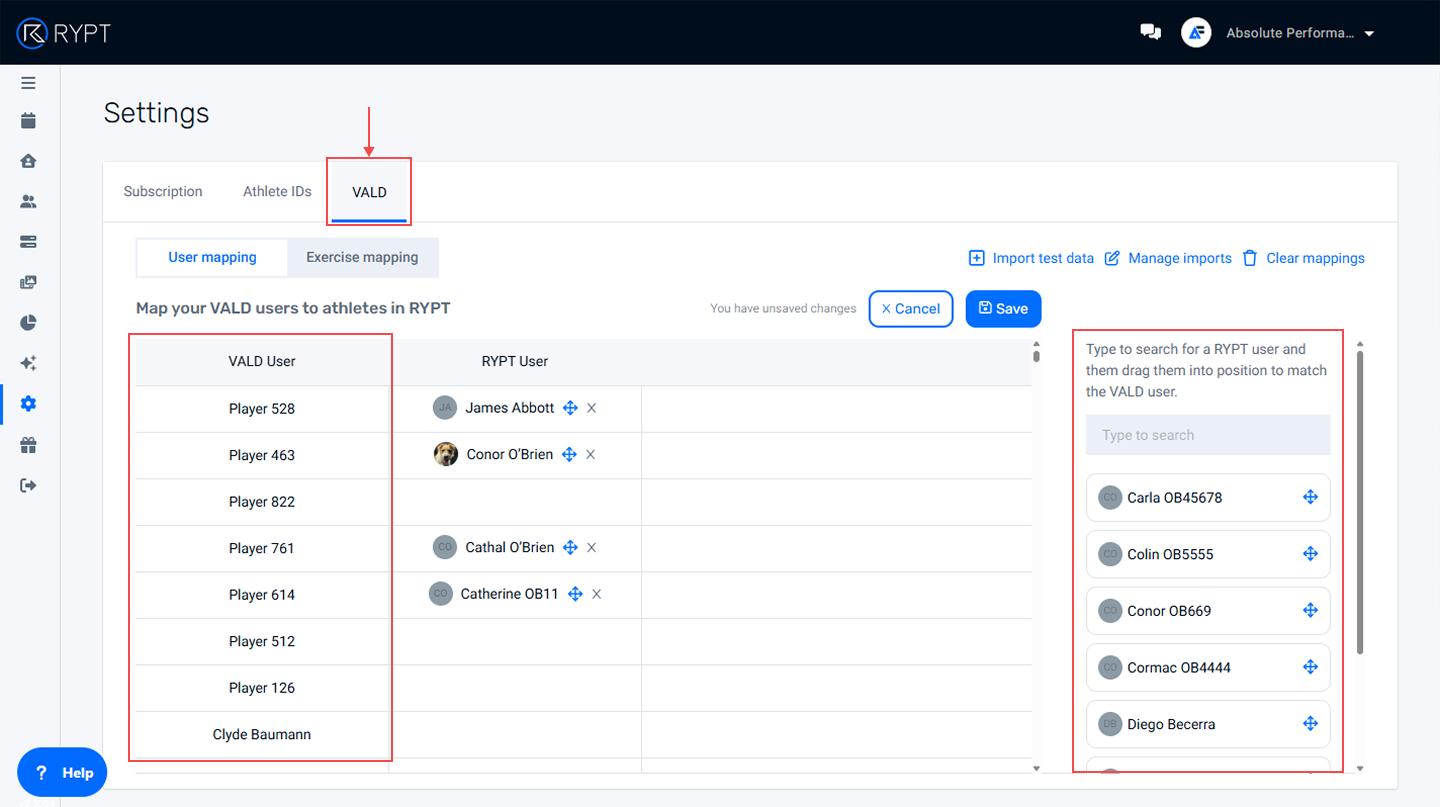
When you open the screen, on the left hand side, you'll see a list of the athletes from your VALD Hub. On the right hand side, you'll see your RYPT athletes.
You can type to search for an athlete, and drag and drop the athlete to map them with the corresponding VALD athlete. When you've mapped all your athletes, just click Save to save the mappings.
RYPT/VALD Exercise Mapping
VALD exercises are automatically mapped to RYPT exercises as detailed in this table (these mappings cannot be edited):
VALD Exercise | RYPT Exercise |
|---|---|
Countermovement Jump | CMJ |
Isometric mid-thigh pull | Isometric Mid-Thigh Pull |
ISO Squat | Isometric Squat |
SL ISO Squat | SL Isometric Squat |
Nordic | Nordics |
Razor | Razo Nordics |
ISO Prone | ISO Prone Hamstring (0 deg) |
ISO 30 | ISO Prone Hamstring (30 deg) |
ISO 60 | ISO Prone Hamstring (60 deg) |
Step 3 / Import your test data
When your athlete mapping is complete, you're ready to start importing your data. This is done on the Settings screen from the VALD tab. Click the Import Test Data button to get started.
Review your athlete mappings
Step 1 is to review your athlete mappings. Here we'll show you how many of your RYPT athletes are mapped to VALD athletes. If any of your RYPT athletes are not mapped you can click the button on screen to update the mappings before carrying out the import
Select Dates
Step 2 is to select the dates you want to search for VALD test data on. Here you choose a month that you want to query and when you click Next, we'll pull a list of all your VALD testing data within that month. The list contains each date within the month that you have VALD test data, and for each date it identifies what testing equipment was used, whether or not it has been imported to RYPT, and if so, which coach imported it.
Review and confirm
Finally, you'll select a date you want to import (only one date can be imported at a time), and click Import to sync your test data to RYPT.
Viewing your imported test data
When you've imported your test data to RYPT, it can be viewed in a number of places:
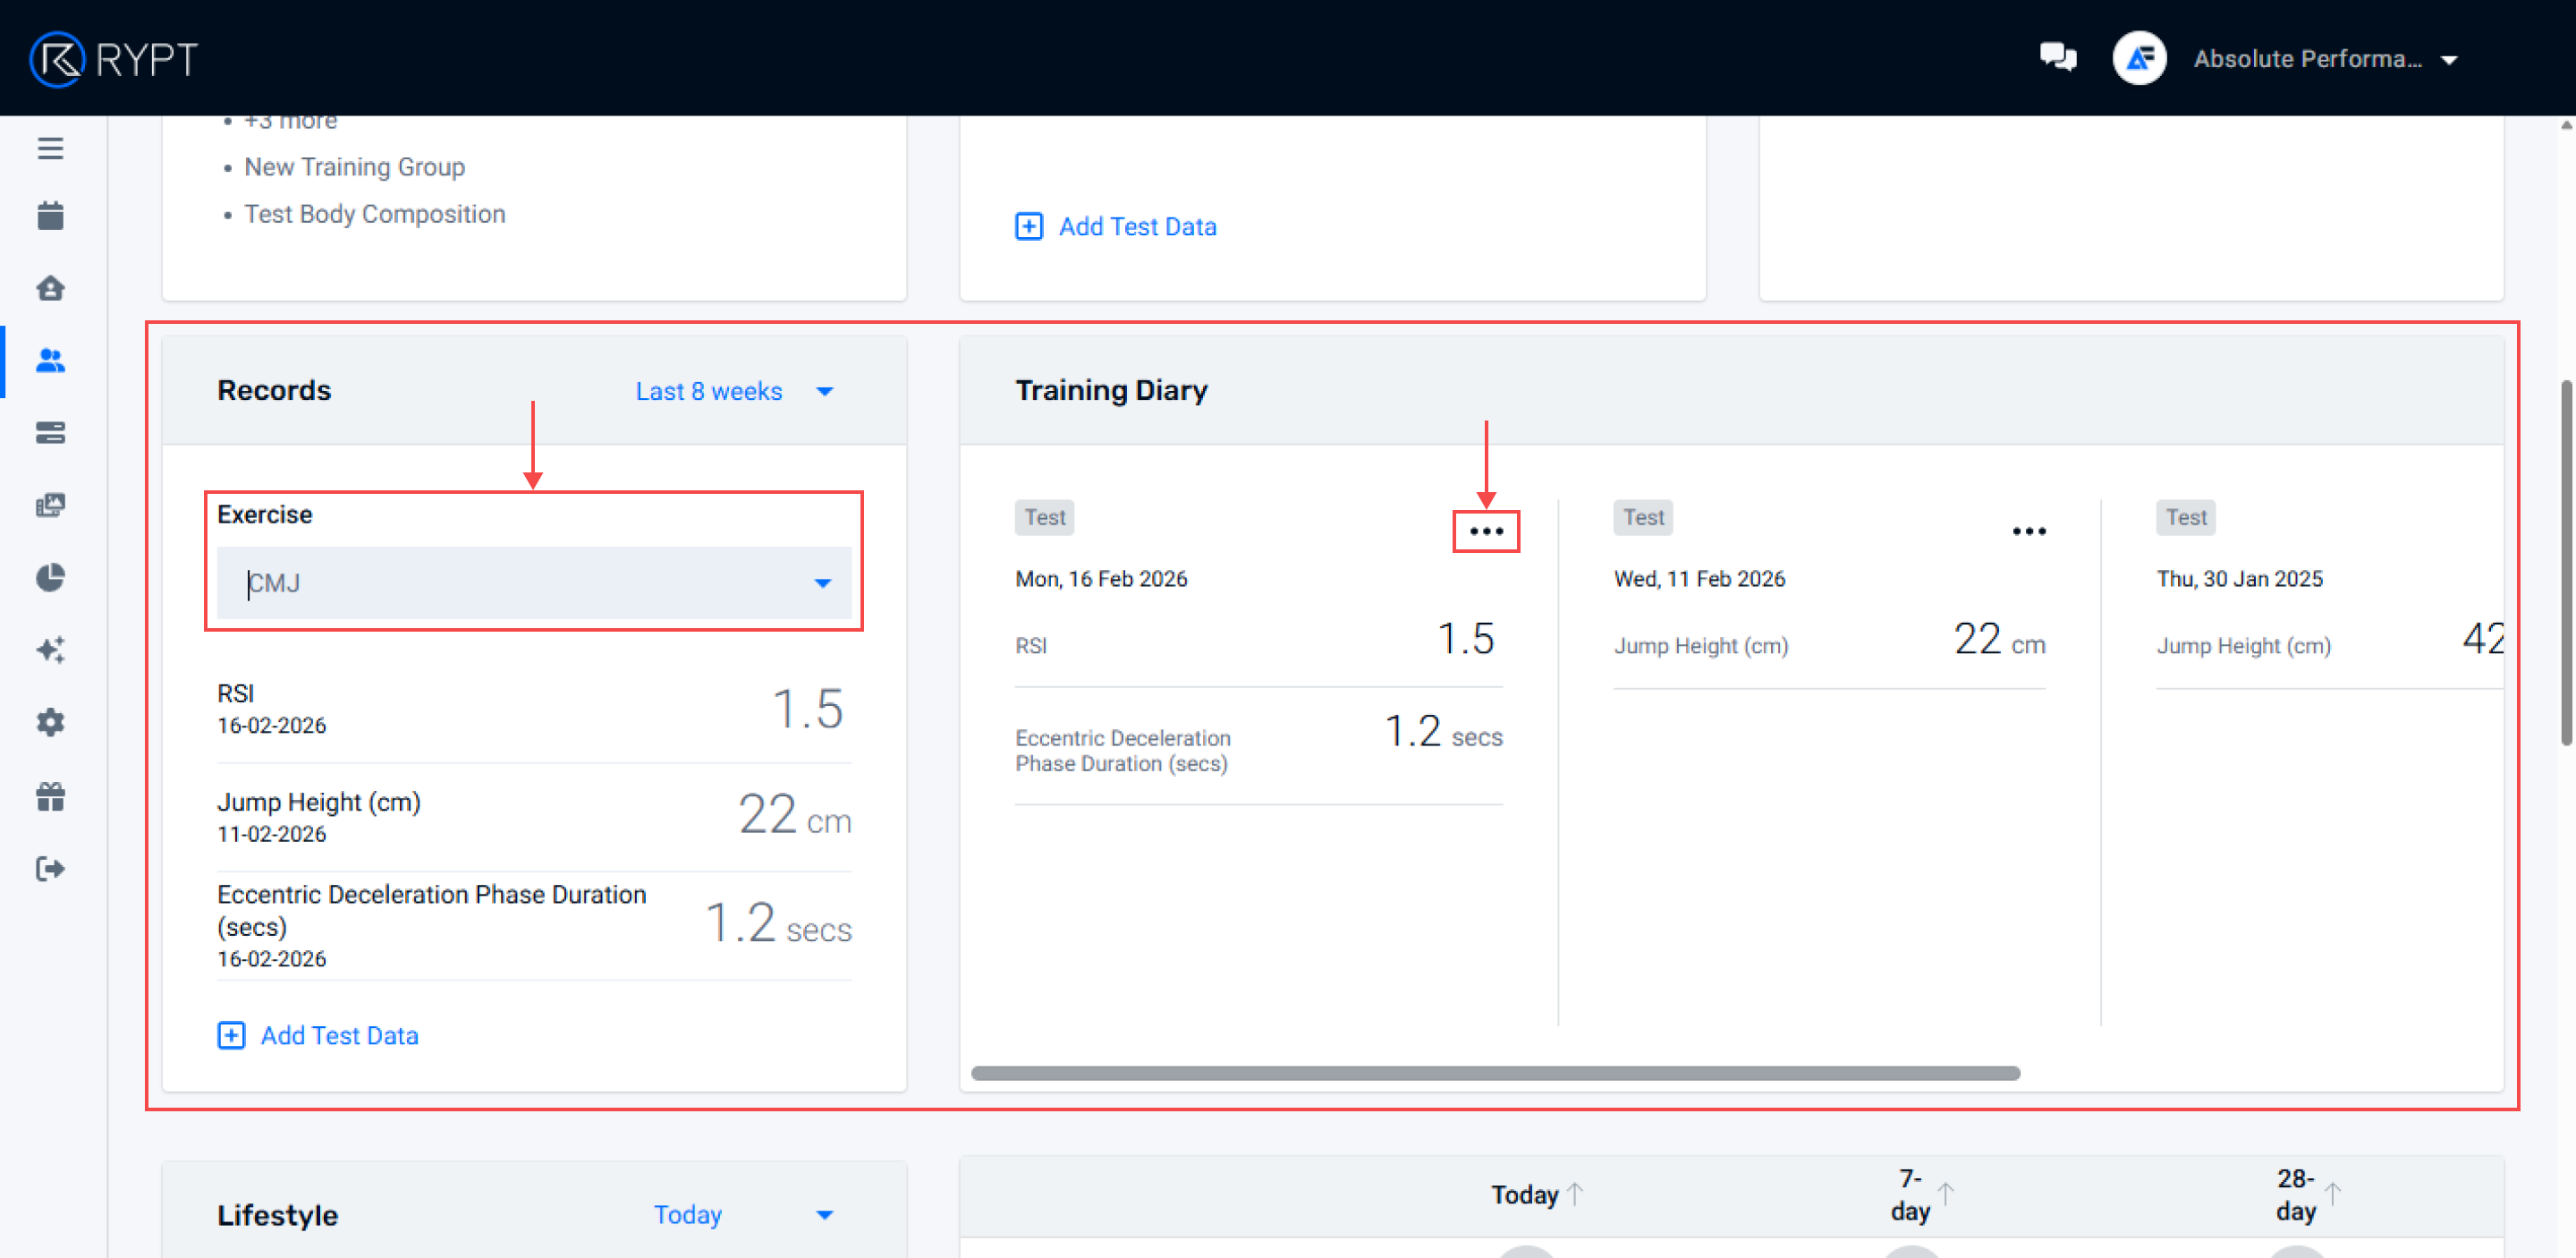
Get an overiew of exercise history in the User Profile
In the user profile, you can select any exercise to view an athletes records, recent and Personal Best, and their Training Diary, a history of tests and workouts they've completed that exercise in. Just open the athlete's profile, and select any of the VALD test exercises to view their data.
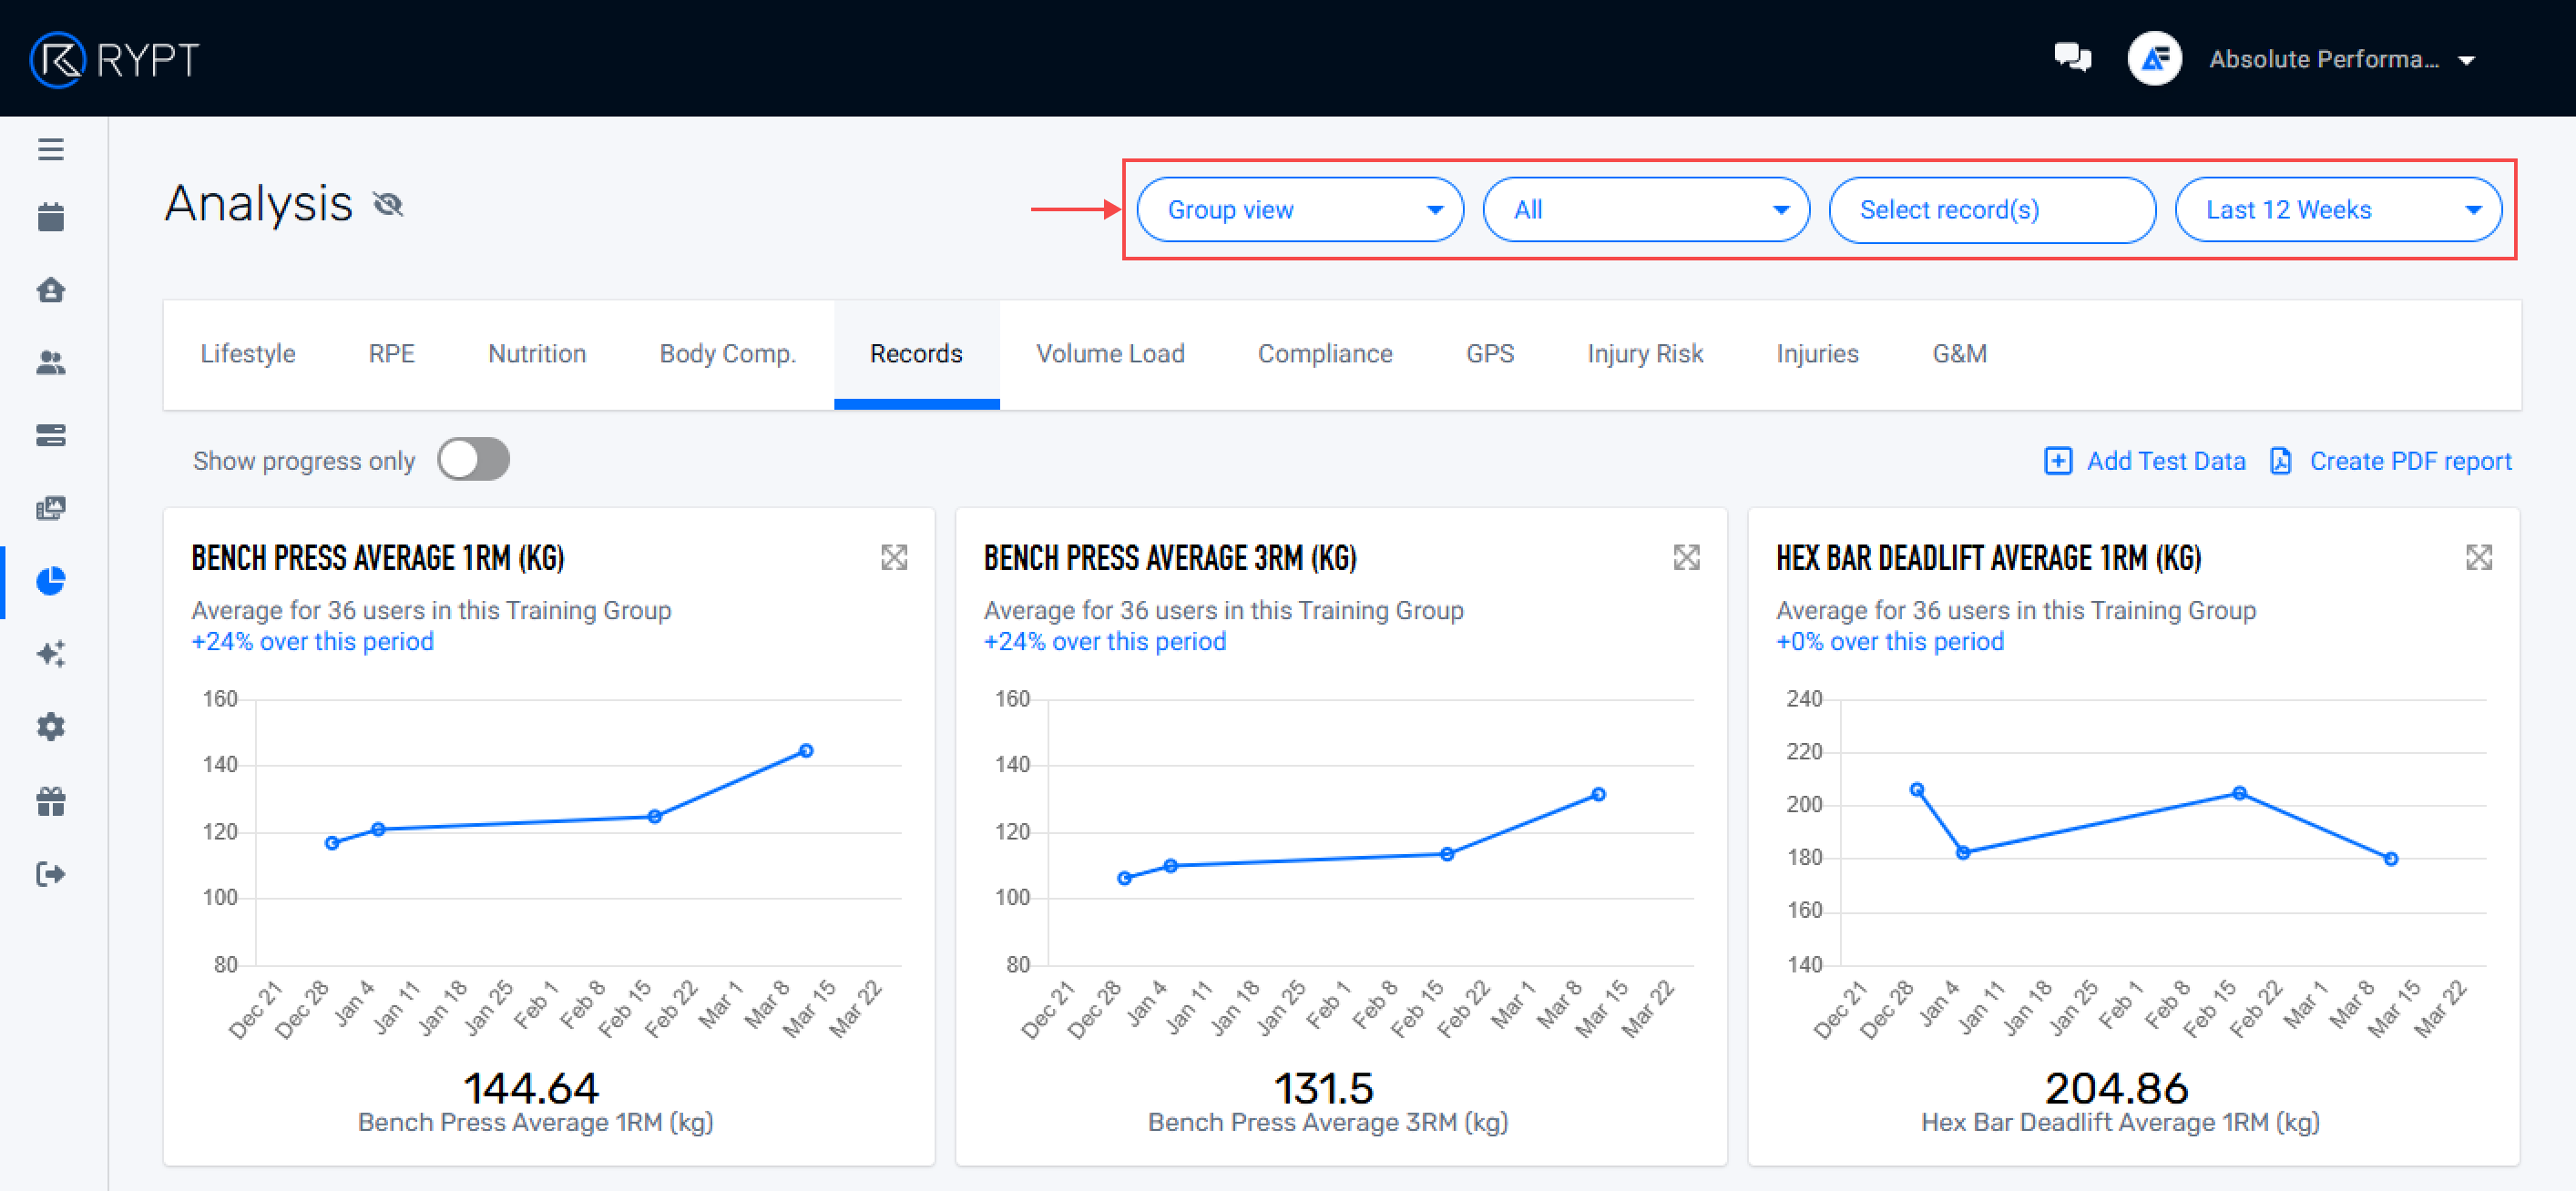
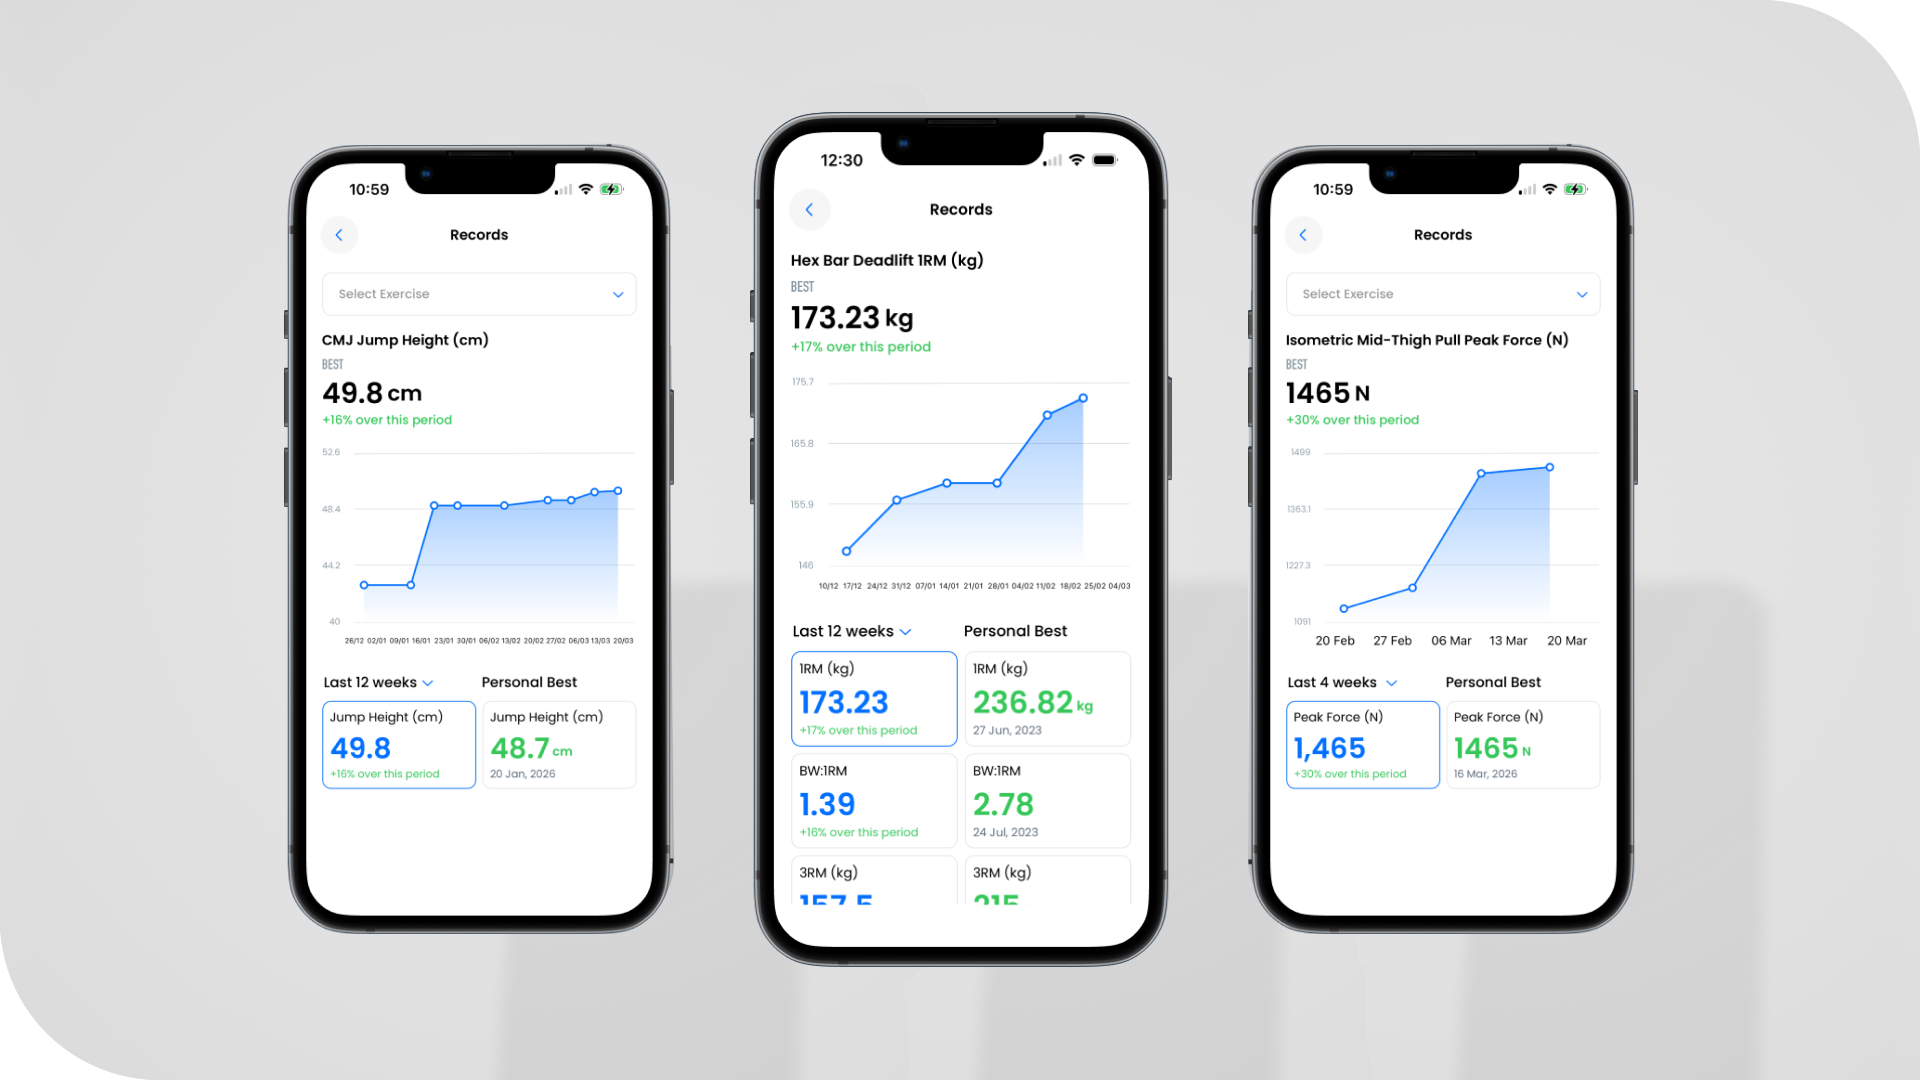
Track Performance in the Records Dashboard
To visualise your athletes' test data and progress over time, open the Analysis section and click on the Records tab. Here you can select different tests to include in a report and visualise your athletes' performance over a defined time period.
Just click Select record(s) to choose the records you want to include in your report, and select the athletes and time period you want to report on. The report generates charts and a table of the data.
Monitor Physical Readiness in the Injury Risk Dashboard
The Injury Risk report combines your athletes' perceptual readiness data, internal and external load data, and physical readiness data to help you identify any potential drop offs in performance or athletes who may be at an increased risk of injury.
You can select up to 3 physical readiness tests to include in the report. If you select exercises from your VALD testing, the data will automatically be populated into the report when it's imported.
RYPT uses the smallest worthwhile change to identify any worthwhile changes in your athletes' test data, and colour codes the data to flag athletes who have a drop-off in performance.
Watch this short demo for more on the Injury Risk report:
Athlete Access in the RYPT App
Once your athletes' test data is imported RYPT, they can view it via the RYPT App. In the Records screen they can select any exercise to view their recent test records and Personal Bests, and chart their progress.
Removing Imported Test Data
If you realise that you have made a mistake after importing data, you can undo the import by opening the Settings screen, clicking on the VALD tab, and clicking Manage Imports as shown below. Here, your imports will be listed by import date.
If you click on the menu icon to the right-hand side of the import on the list, you can View details if you want to confirm what was imported, and you can click Remove import if you need to remove all the test data from that import.